DIY Plaster Slabs for Clay Recycling
Recycling clay is one of the things I’ve been putting off since I started pottery. Sadly, I have 3 buckets of reclaim that need to be processed. Here’s how I created my own plaster slabs for recycling the clay I’ve accumulated.
Methods
If you’ve been researching videos online for creating your own plaster slabs, you’ll notice a lot of people creating their own wedging tables and plaster slabs on top of a table. But, if you don’t have the space for it there is also a tote method. In my opinion, this is the easiest and most convenient method. Especially if space is an issue for you. All you do is mix the plaster with water, dump it into a clean tote, let it dry for a couple of hours, pop it out and it’s done.
Materials Needed
A medium sized tote
1 bag of pottery plaster
1/4 full bucket of water
Wooden stick or spatula
A garbage bag (not necessary but helps tremendously with cleanup)
Respirator mask (VERY important! You don’t want plaster in your lungs)
I’ve created an Amazon idea list of all of the items needed above, to view it, click here.
Make sure your mask is on before starting!
Instructions
I didn’t measure any of the plaster or the water. I was really trying to pay attention to the texture and thickness of the mixture. With that being said, I got a bucket from Lowe’s, lined it with the garbage bag (optional but helpful) and filled it up about 1/4 of the way with cold water, so not too much.
Next, I started to add about a cups worth of plaster to the water and slowly mixed it together. You want to make sure you are mixing it thoroughly before adding another cup to prevent any lumps. Once it’s mixed together, keep adding plaster until it starts to thicken.
I kept adding plaster until the a thin layer stuck to my hand, but it was runny enough to go back into the bucket. See the photo below for a better understanding.
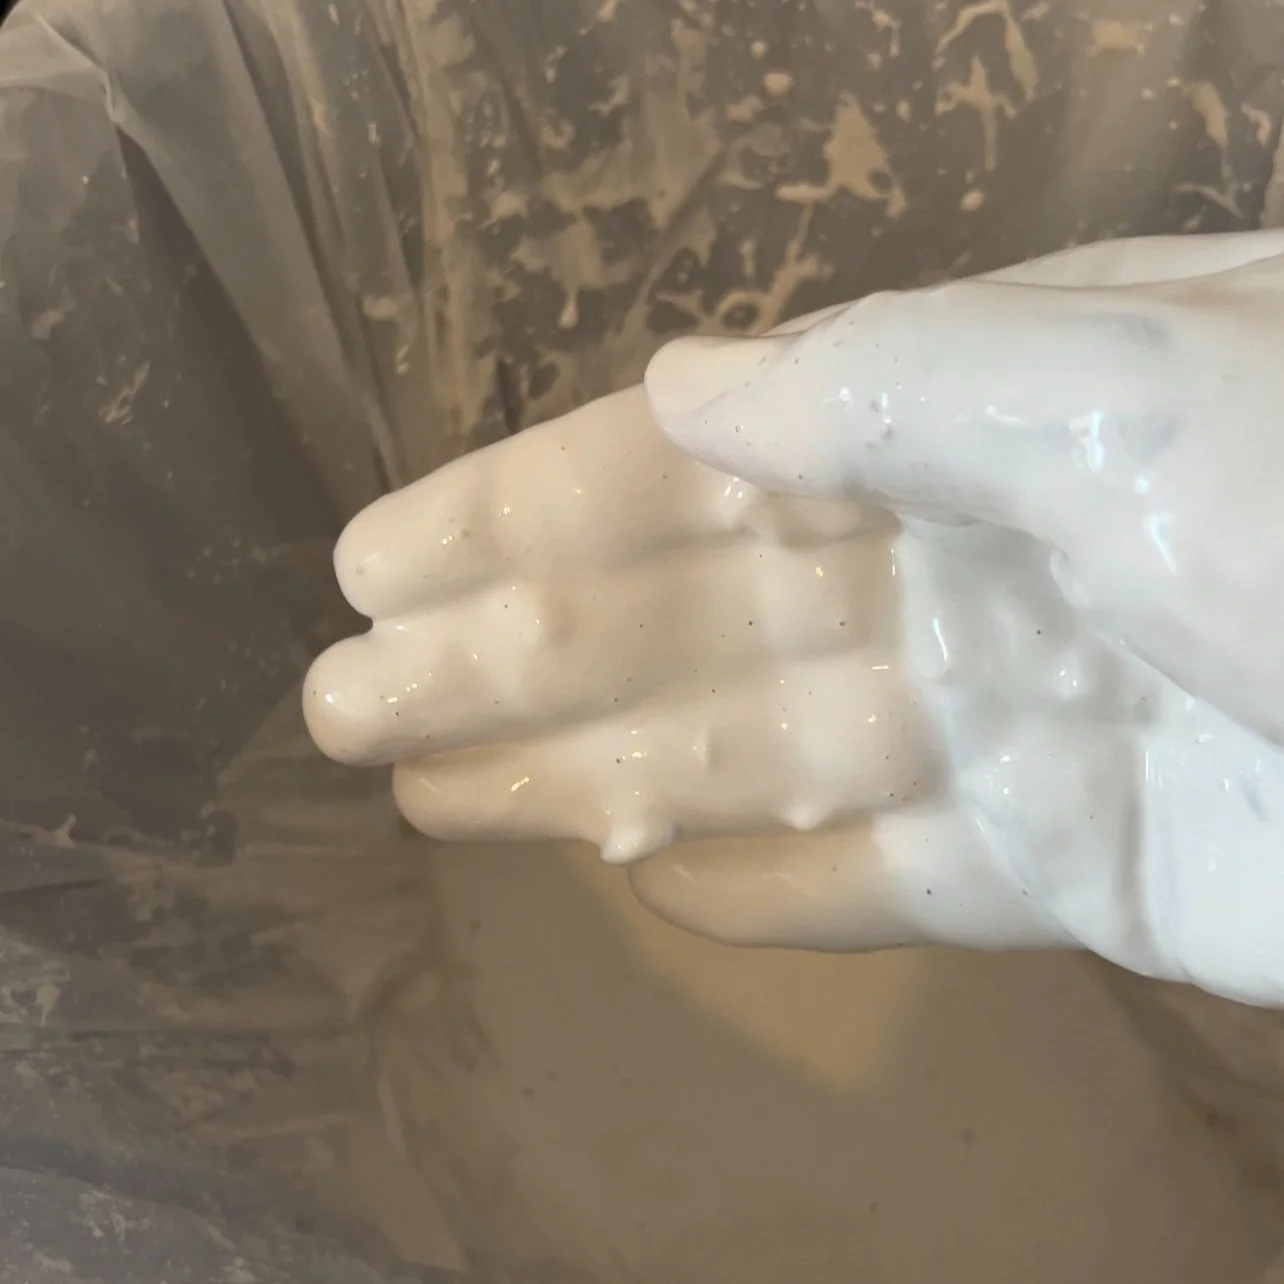
This is the consistency you should aim for. Thick enough to stick to your hand but runny enough to go back into the bucket.
4. Once your mixture is about the consistency of a melted smoothie, you’re going to grab your tote and slowly pour the mixture in. Be careful not to pour too much, you don’t want a really thick plaster slab. I would aim for about 2-3 inches thick. It’s always a good idea to have another smaller tote around so you don’t waste the plaster if you don’t use it all.
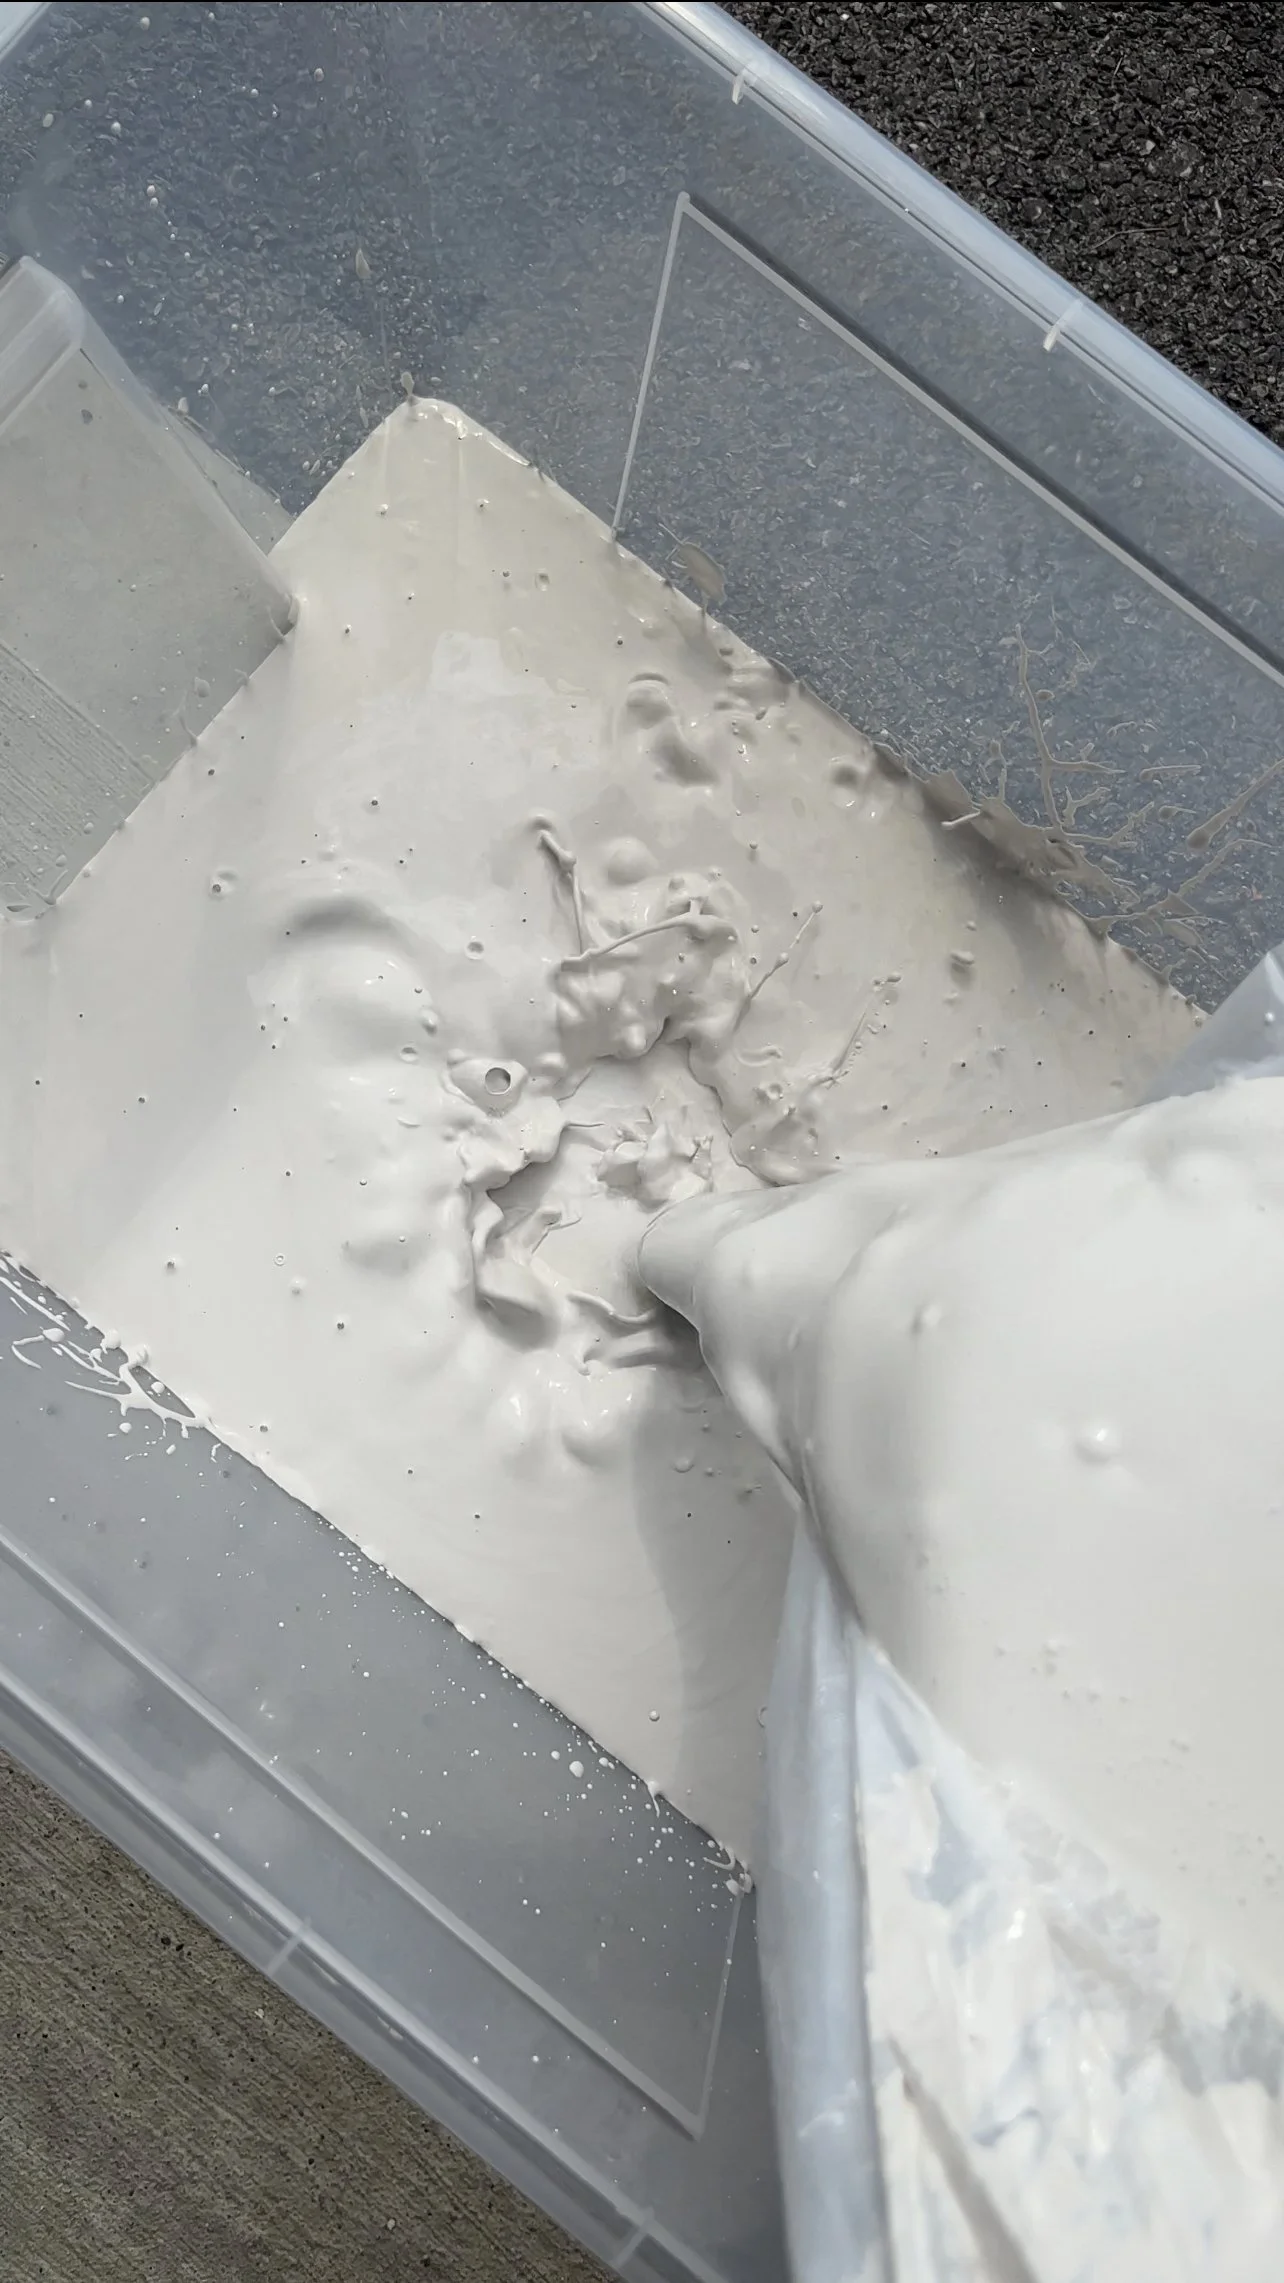
Pour the plaster into the tote
Pour the slab about 2-3 inches thick. If you pour it too thick, it will take forever to dry.
5. Now that the mixture is in the tote, you are going to gently tap the sides to help release any air bubbles.
6. Now it’s time for it to dry. I live in Missouri so it gets pretty hot in the summer. I left the tote in the sun for about 2-3 hours and it was dry enough for me to pop it out of the tote and set it aside. If that doesn’t work for you, let it sit overnight.
7. Once it’s ready, it’s pretty easy to pop out. Be careful because you don’t want to break it. Once you have it out of the tote, set it aside and let it sit out for about 5-7 days. This allows the plaster to become fully dry. if you try adding wet clay to a partially wet plaster slab, it’s going to take longer than a week for it to dry out so I would wait until the plaster is fully dry before adding anything to it.
That’s it! Now you have a nice big slab of plaster for clay recycling. Below is a video of the process in case anyone is a visual learner. If you try it, let me know down below!
Follow my pottery account to stay updated on any new projects!